

Yesterday, on Holy Wednesday, the children of our church gathered to make bread that will be used for our Maundy Thursday Holy Communion service (A post on that tomorrow!). We used the following recipe from Bethany Thomso of the food blog, A Spoon Full of Yum. Bethany is wife to The Farmer, mother of four little ones who she home schools in Tennessee, and a former dietician with a lifelong interest in nutrition. Thank you, Bethany, for your recipe and reflection!
In prayer, we express our dependence upon the Lord, drawing sustenance from Him, and, just so, the very act of eating bread should remind us of how utterly dependent we are upon Christ, the Bread of Life. Jesus taught his disciples to pray that the Father would “give us this day our daily bread” (ESV). Hearkening back to Proverbs 30:8, we may pray: “…Feed me with the food that is needful” (ESV). No matter our level of education or socioeconomic status, we will never rise above our basic need for food. This should remind us that whether we live in paucity or plenty, we are dependent upon our Father to meet our every need.
Today I share with you a recipe for the homemade pita bread that my whole family enjoys and that I sometimes make for communion. This is a one-bowl recipe that you can easily make by hand, in a stand mixer, or in a bread machine. If you aren’t used to making your own bread, this is a great starter recipe for a simple yeast bread. I like the taste of freshly milled spelt and kamut flour in this pita. If you don’t mill your own grains, you could try these spelt and kamut flours from Bob’s Red Mill. Or, if you want to use a basic whole wheat flour, I would suggest trying King Arthur Whole White Wheat flour. Because store bought wheat flour behaves differently than freshly milled flour, you may need to increase the water or oil according to instructions in the recipe.
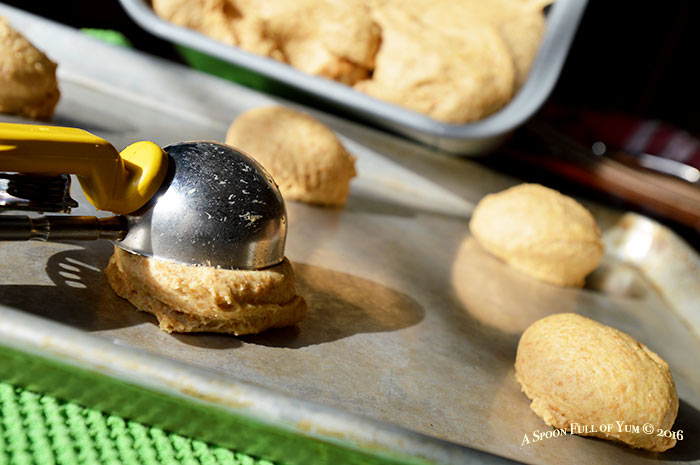
Because I like to make things easy, I just scoop my pita dough out of the bowl or pan using my trusty food service scoops. For this recipe I use a #20 scoop which holds about 3.25 tablespoons of dough, yielding a nice 4″ pita. You could try an ice cream scoop to portion your dough as well. These smaller sized pitas are perfect for little hands and I don’t even cut them in half to serve. My “Little Farmers” like to roll out their own pitas onto the baking sheet.
Serving Suggestions: For a delicious spring lunch, serve with creamy hummus and crudités (think baby carrots, cucumber strips, and mini peppers). Pitas also travel well because they don’t crumble as easily as loaf bread, so I will often pack these for a picnic! Try topping a pita with cheese and broiling until cheese is golden and bubbly. For pita pizzas, spread a small amount of pizza sauce over the surface of the pita, add your favorite toppings and cheese, and bake at 400˚ until cheese is golden and bubbly.
Homemade Whole Grain Pita Bread
Spelt and Kamut, two ancient varieties of wheat, unite for a remarkably flavored pita bread.
8 fl. oz warm water (110-120 degrees, no hotter)
1 Tablespoon olive oil
1-1/4 teaspoons sea salt
2 Tablespoons honey
1-1/2 cups spelt flour* (I use freshly milled flour)
1-1/2 cups kamut flour* (I use freshly milled flour)
1-1/2 teaspoons active dry yeast
** If you do not have access to spelt or kamut flour, you can substitute freshly ground whole wheat flour or King Arthur Whole White Wheat flour.
1. Add water, olive, oil, honey, and salt to the bottom of a mixing bowl. Stir together.
2. Add flour and yeast. Stir to combine ingredients.
3. Knead dough:
— Kneading by hand: Knead the dough on a well floured surface for 4-5 minutes
— In a KitchenAid stand mixer: Using dough hook, knead on speed “2” for 4 minutes (5 minutes if making a double batch). The dough should feel soft and a little “tacky”, becoming less sticky as it sits and absorbs some moisture (as is the case when you use whole wheat flour). If the dough seems too dry (especially if you are not using freshly milled flour) you can add a little more water, 1 tablespoon at a time until dough is a little more sticky. You could also try adding about 1 tablespoon more oil to the dough.
4. Cover bowl with a towel and allow to rise until double in size, about 30-60 minutes (if it doesn’t double, it will be fine to proceed to the next step.)
5. After dough has risen, punch down dough and remove dough from bowl.
6. Divide dough into 8-12 equal parts (depending upon the size pita you would like). You can either scoop out dough with a foodservice (or ice cream) scoop, or you can roll it into log on a greased or floured cutting board and divide into equal parts.
7. Place dough rounds onto a baking sheet that has been lightly greased with coconut oil or palm shortening. (You can usually fit 4 to 6 pitas onto a baking sheep depending upon the size of the pita.)
8. Roll each part into a circle directly on the pan to about a ¼” thickness (you don’t have to be precise about the shape).
9. Allow the dough circles to rest/rise on the baking sheet while the oven preheats to 500°.
10. Place baking sheet into hot oven. Bake for 5-8 minutes (depending upon the size), watching closely, until pitas are slightly browned and puffy.
11. Allow pitas to cool slightly on cooling rack. Slice into halves if desired.

Notes:
To make in a Zojirushi bread machine, use the following settings on the “homemade” mode: Preheat 5 min; knead 10 min; rise 1 hr.
Freezes well! Just place cooled pitas into a zippered food storage bag and press gently to remove air. Seal and freeze. Warm or lightly toast to serve.

Pingback: Baking Bread for Maundy Thursday | The Homely Hours